Detecting Leaky Pipes
- Monitor Your Water Bill A sudden increase in your water bill without any significant change in water usage is often the first sign of a leak. Compare your current bill to previous months to spot any discrepancies.
- Check Water Meter Turn off all the water in your home and check the water meter. If the meter continues to run, it’s a clear indication of a leak somewhere in the system.
- Inspect for Visible Signs
- Damp Spots: Look for damp spots on walls, ceilings, and floors.
- Water Stains: Brownish or yellowish stains can indicate water damage.
- Mold and Mildew: Persistent dampness can lead to mold and mildew growth, which is often visible or has a musty smell.
- Rust and Corrosion: Inspect pipes for rust or corrosion, which can indicate a slow leak.
- Listen for Drips Sometimes, you can hear water dripping, especially at night when the house is quiet. Listen near appliances, faucets, and exposed pipes.
- Use Food Coloring For suspected toilet leaks, add a few drops of food coloring to the tank. If the color appears in the bowl without flushing, you have a leak.
Repairing Leaky Pipes
Once you’ve detected a leak, it’s important to repair it promptly. Here’s how to address common types of leaks:
- Turn Off the Water Supply Before starting any repair, turn off the water supply to the affected area to prevent further water damage.
- Repairing Leaks in Joints
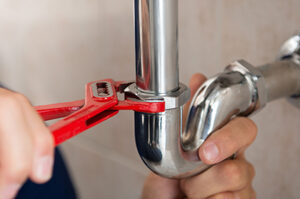
- Tighten the Fittings: Use a wrench to tighten the fittings. Be careful not to over-tighten, as this can cause damage.
- Replace Washer or O-ring: If tightening doesn’t work, the washer or O-ring might be worn out. Replace them to stop the leak.
- Fixing Pinholes in Pipes
- Pipe Clamps: Use a pipe clamp to cover the pinhole. This is a temporary fix but can hold until a permanent repair is made.
- Epoxy Putty: Apply epoxy putty over the pinhole. Make sure the pipe is dry before applying the putty, and follow the manufacturer’s instructions.
- Replacing a Section of Pipe
- Cut Out the Damaged Section: Use a pipe cutter to remove the damaged section.
- Measure and Cut a New Piece: Measure the length of the removed section and cut a new piece of pipe.
- Join with Couplings: Use couplings to connect the new piece of pipe to the existing pipes. Ensure a tight fit to prevent future leaks.
- Fixing Leaky Faucets
- Replace Washer: A common cause of faucet leaks is a worn-out washer. Disassemble the faucet and replace the washer.
- Replace Cartridge: For cartridge-type faucets, replacing the cartridge often solves the leak.
Preventing Future Leaks
- Regular Inspections Schedule regular inspections of your plumbing system to catch potential issues early.
- Insulate Pipes Insulate exposed pipes, especially in colder areas, to prevent freezing and subsequent leaks.
- Water Pressure Regulation High water pressure can strain pipes and cause leaks. Install a pressure regulator to maintain optimal pressure levels.
- Upgrade Old Pipes If your home has old plumbing, consider upgrading to modern, durable materials to prevent frequent leaks.
When to Call a Professional
While many minor leaks can be fixed with DIY methods, don’t hesitate to call a professional plumber for major leaks or if you’re unsure about the repair process. A licensed plumber can ensure the job is done correctly and safely.
Detecting and repairing leaky pipes promptly can save you from costly water damage and keep your plumbing system in top condition. By following these steps, you can effectively manage leaks and maintain a healthy home environment.
Elite Plumbing of Florida provides plumbing services in Clearwater, Palm Harbor, and Safety Harbor and most of Pinellas County.
For more information, visit our website https://eliteplumbingoffloridallc.com/or call (727) 301-4846.
