1. Flooded Septic Tanks and Backed-Up Sewer Lines
- The Issue: Floodwaters can infiltrate septic systems, causing them to overflow. Likewise, the immense pressure from floodwaters can lead to sewer lines backing up into homes.
- Repairs Needed: Plumbing professionals will inspect the septic tank and sewer lines, pump out any excess water, and repair any breaks or clogs. They’ll also check for contamination to ensure your water is safe for use.
- Prevention Tip: Consider installing a backflow valve to reduce the risk of sewer backups during future storms.
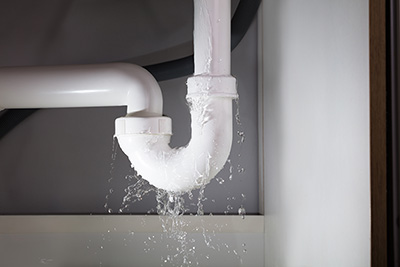
2. Pipe Leaks from Shifting Foundations
- The Issue: Hurricanes often result in shifting foundations due to the saturation of ground soil, which puts stress on plumbing pipes and can lead to cracks and leaks.
- Repairs Needed: A plumber will use advanced leak detection tools to locate any hidden leaks in the foundation or walls. Leaking or damaged pipes may require repairs or full replacement to prevent ongoing water damage.
- Prevention Tip: Regularly monitor your home’s foundation and get professional inspections after any significant weather events to identify and fix potential issues before they escalate.
3. Clogged or Damaged Drains from Debris
- The Issue: Wind and rain often bring in large amounts of dirt, leaves, and debris that can clog drains and even damage underground plumbing pipes.
- Repairs Needed: Plumbing experts will remove any debris from drains, check for breaks in underground pipes, and may need to snake or hydro-jet the lines to ensure smooth water flow.
- Prevention Tip: Install drain covers to help keep larger debris out, and have your drains professionally cleaned as part of post-hurricane maintenance.
4. Contaminated Water Supply Lines
- The Issue: Floodwater often carries harmful contaminants, from bacteria and chemicals to debris that can affect your water supply.
- Repairs Needed: A plumber can flush and sanitize your water supply lines, and in severe cases, replace contaminated pipes. This process may include testing water quality and possibly installing new filters.
- Prevention Tip: Always keep bottled or filtered water on hand for emergencies and consider having water filtration systems in place to help mitigate contamination.
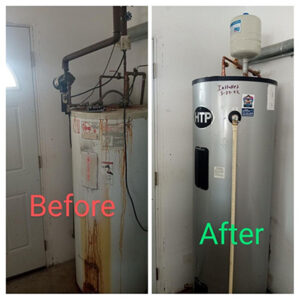
5. Water Heater Damage and Malfunctions
- The Issue: Floodwaters and power outages can damage water heaters, affecting their efficiency or rendering them completely inoperable.
- Repairs Needed: A plumbing professional will inspect the water heater for electrical damage, check for gas leaks, and test the heating elements. In some cases, the entire unit may need replacement if the damage is extensive.
- Prevention Tip: Secure your water heater with a raised platform to protect it from floodwaters, and ensure gas lines are in good condition.
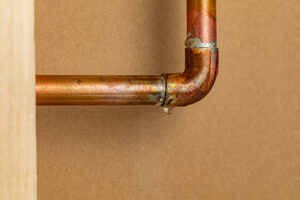
6. Broken Water Mains and Outdoor Pipes
- The Issue: During hurricanes, powerful winds and heavy debris can cause breaks or cracks in outdoor plumbing, including the water main.
- Repairs Needed: Repairs often require digging to locate the damaged pipes, sealing or replacing broken sections, and ensuring no leaks remain. This is essential to restore a safe water supply and prevent excessive water bills from undetected leaks.
- Prevention Tip: Shut off the main water supply during hurricane warnings and consider hiring a plumber to inspect your outdoor pipes regularly.
7. Damaged Sump Pumps and Basement Flooding
- The Issue: Sump pumps are crucial during storms to prevent flooding in basements, but they can become overworked or damaged in severe conditions.
- Repairs Needed: A plumber can inspect your sump pump, clear any blockages, and repair or replace damaged components. Testing your pump’s effectiveness post-storm ensures it’s ready for future storms.
- Prevention Tip: Have a battery-powered backup sump pump and regularly test your main unit before storm season.
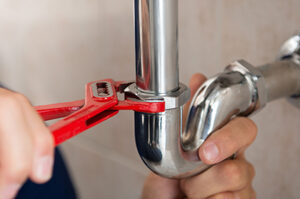
Why Professional Plumbing Inspections are Essential Post-Hurricane
After a hurricane, some plumbing issues may not be immediately noticeable but can lead to bigger problems if left unaddressed. A professional plumbing inspection can help identify hidden damage, prevent water loss, and maintain the safety and integrity of your water system. Many plumbing companies offer post-hurricane inspections and emergency services, so don’t hesitate to reach out if you’re concerned about any aspect of your plumbing system.
Final Thoughts
Hurricanes are powerful forces that can have lasting effects on plumbing systems. By staying vigilant and scheduling necessary repairs promptly, you can protect your home from further damage and avoid costly future repairs. Professional plumbers have the tools, expertise, and experience to ensure that your home’s plumbing is restored and fortified against future storms.
Elite Plumbing of Florida provides plumbing services in Clearwater, Palm Harbor, and Safety Harbor and most of Pinellas County.
For more information, visit our website https://eliteplumbingoffloridallc.com/or call (727) 301-4846.